
Introduction to Virtual Influencer Creation
In the digital age, ‘Virtual Influencer Creation’ or ‘AI Model Creation’ is becoming a popular trend on social media platforms. These AI-generated models, also known as virtual influencers or ai models, are gaining popularity due to their high engagement rates and lucrative sponsorship deals. Some even venture into NSFW content, earning millions annually. However, creating these Virtual Influencer can be challenging due to the limitations of existing tools. This article aims to guide you a perfect virtual influencer creation or AI Model Creation using free and open-source resources.
The Challenges with Existing Tools in Virtual Influencer Creation
High Pricing
Generating images for Virtual Influencer requires substantial GPU and CPU computation power. As a result, most popular tools come with a hefty price tag, making them inaccessible for beginners or students.
Lack of Detailing & Consistency
Despite being paid tools, some fail to generate high-quality, realistic images. Common issues include inappropriate or missing details like fingers and inconsistent facial features due to the inability to store face details.
NSFW Restrictions
Many tools restrict the generation of NSFW or nude content in their generated images, often reserving this feature for their premium plans.
The Solution: Free and Open-Source Resources for Virtual Influencer Creation
Free and open-source resources offer a cost-effective solution to these challenges. However, they require high-end GPUs, which may not be affordable for everyone. This is where Google Colab comes in. It provides the necessary GPU resources to generate images without using your device’s GPU power.
Introducing Fooocus: A GitHub Tool for Virtual Influencer Creation
For Virtual Influencer Creation or AI Model Creation, we use a tool called Fooocus. Fooocus by lllyasviel is a tool available on GitHub that meets our requirements. It allows the generation of NSFW content and does not have the restrictions present in other tools.
Step-by-Step Guide Of Virtual Influencer Creation
The creation of the AI model can be separated into 5 parts:
- Installation & Setup.
- Understanding Prompts.
- Generating a Unique Face For Our Virtual Influencer.
- Understanding Advance Options.
- Generate Different Images from the Generated Face.
Installation & Setup
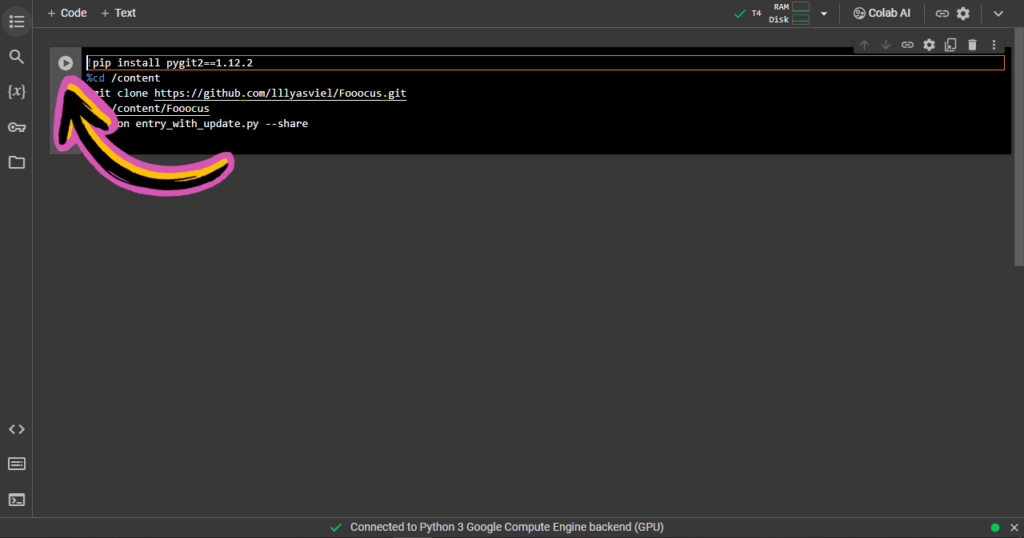
First, click here to open foocus directly on Google Colab from this link. Then click the top right corner button to run it, or use the shortcut key CTRL + Enter (For Windows) Or CMD + Enter (For Mac), you maybe get a prompt “Warning: This notebook was not authored by Google” but don’t worry and just hit “Run anyway“. Now, we need to wait 2-5 minutes while it downloads dependencies through the internet to work correctly. You do not have to worry about download file size because it doesn’t consume your internet to download those dependencies, It will use Google Colab bandwidth to download those dependencies.
Now, when you see a message like this: “Running on public URL: https://055ae63e870b435205.gradio.live“, copy this URL and paste it to the new tab and don’t close the tab where Google Colab is opened. In the new tab, you will see a different UI. From here, you can generate any image from Prompt.
Understanding Prompts
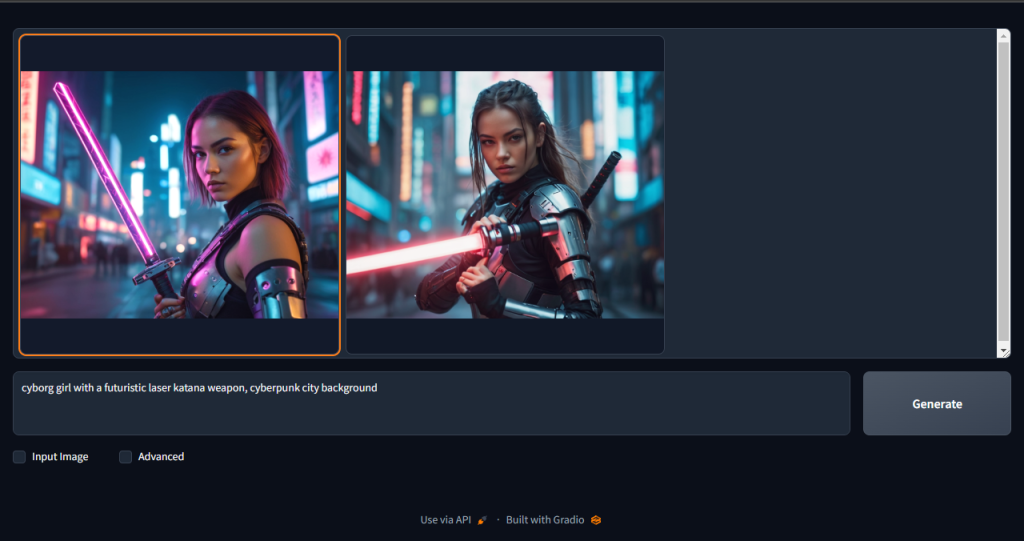
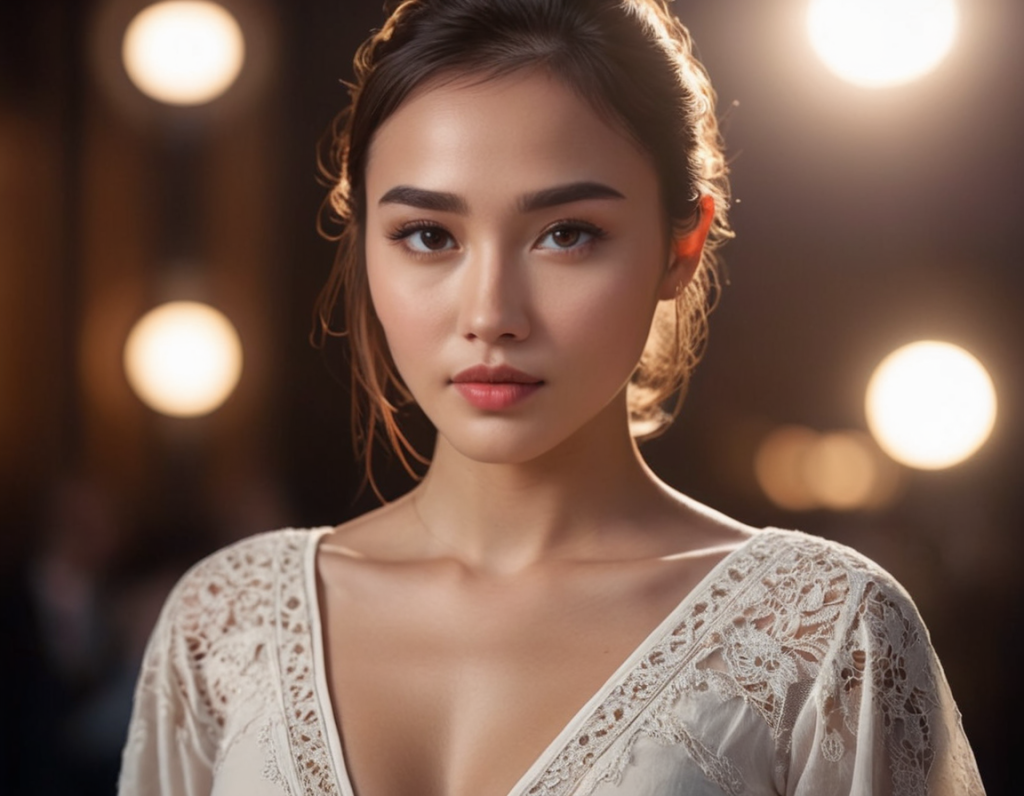
We must understand a little about prompts for Virtual Influencer Creation or AI Model Creation. So, if you are a newbie and don’t know about prompts don’t worry. Prompts are like defining a person’s identity, background, post, action etc in words, separating each with a comma (” , “). Remember to specify the type of Image, like realistic, oil paint or animatic. For Example: “Cute teenage girl, wearing school dress, holding a book in hand, looking at the camera, confused facial expression, Asian accent, black hair, school corridor in the background, 3d rendered, realistic, 8k” and we get image like this

Generating a Unique Face For Our Virtual Influencer
To generate the unique face of our AI model, there are some points we need to keep in mind before generating it, and we are not going to use any words referencing any person, especially a celebrity, politician or public figure. This can get us into trouble. To avoid this, use words that have meaning, not a publically known person’s name. To generate a face for our AI model, specify identity individually. Starting from age -> ethnicity -> facial colour -> each part of face colour, for example, Young girl, Asian accent, Fair skin, brown eyebrows, realistic, 3d rendered, 8k.
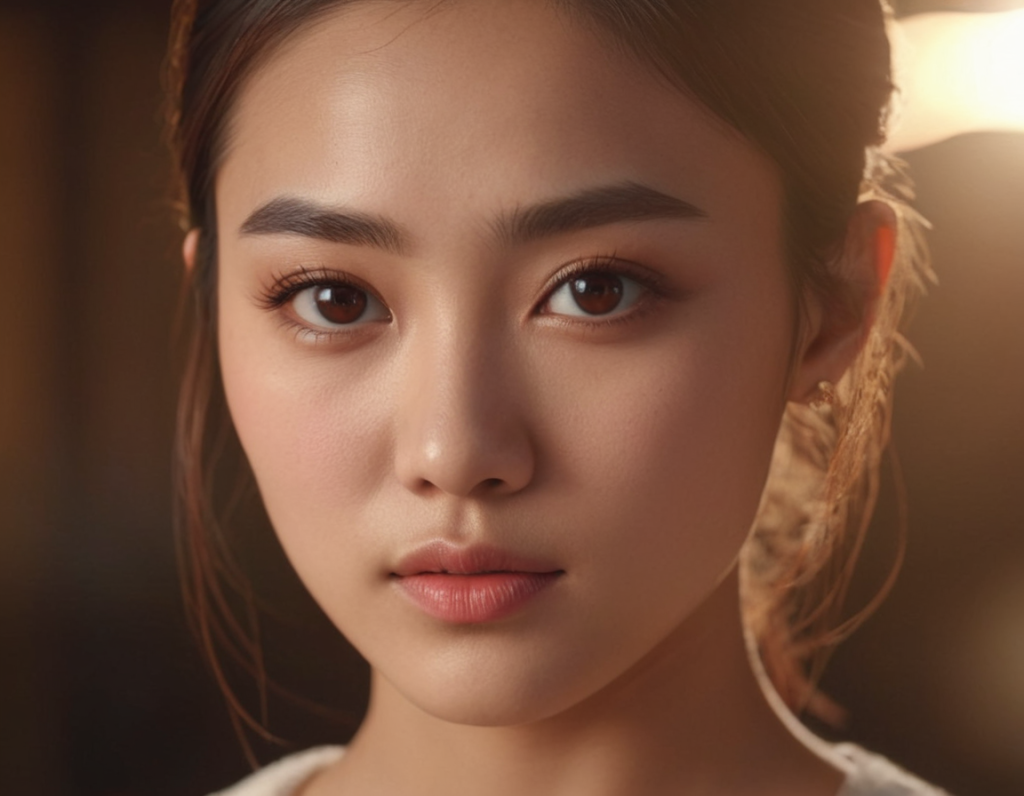
You can generate a face from a simple prompt, but there is a major chance that someone else has already used the face. Now download one of the generated image (if you like it or regenerate it), and keep it somewhere safe because we will use the face from that image later.
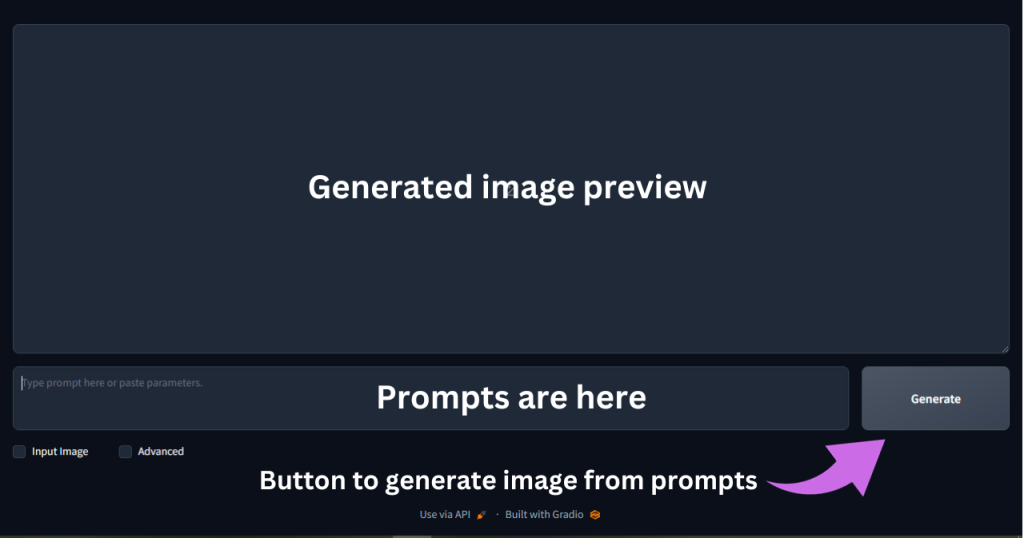
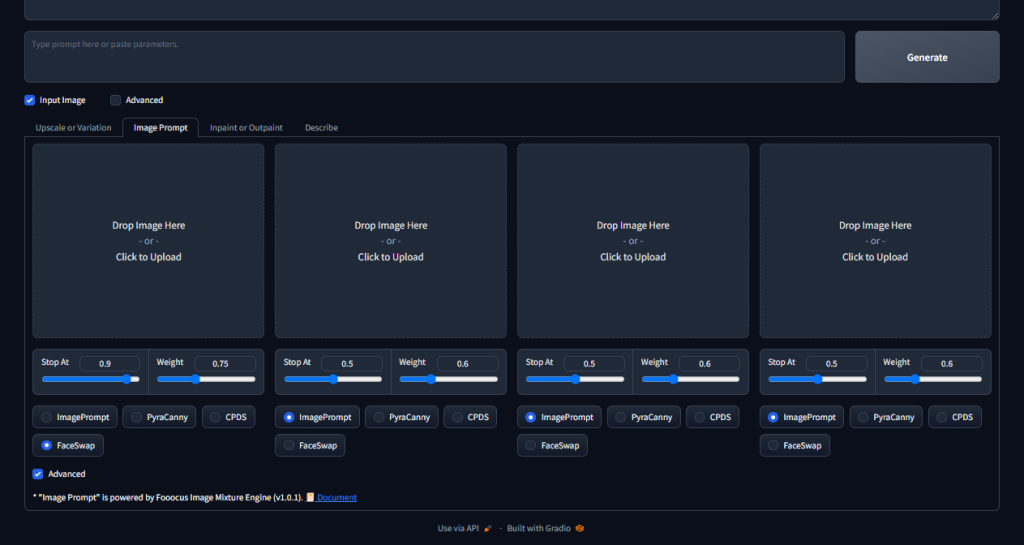
Understanding Advance Options
To generate image from the generated face for Virtual Influencer, we first need to understand advance options of fooocus. When you click on the “Input Image” option and then go to “Image Prompt” tab, you get several boxes to upload an image, now upload the image that we generated for our Virtual Influencer face in the first box. At the bottom of page tick on “advanced” options to tick will appear, but we need to tick face swap and leave the value on default of “stop” and “weight”. You can also play with values if you don’t get the desired result, a brief guide on “Image Prompt” is here you can also read it.
Generate Different Images From The Generated Face
We need to specify several things in the prompt to generate different images of our Virtual Influencer from the generated face, like body figure, skin colour, facial expression, dress, pose, or background. For example: “teenage girl, fair skin, light bokeh overlay background, slightly smiling facial expression”. You can play with prompts for the suitable result
Conclusion
In conclusion, Virtual Influencer Creation or AI Model Creation need not be an expensive or complicated process. With the right resources and tools, you can create your own virtual influencer and join the digital revolution. So, why wait? Start creating your own Virtual Influencer today! However, it’s important to note that the information provided in this guide is for educational purposes only. The misuse of the information or any damages that may arise from the use of the tools mentioned is not the responsibility of us running this blog. Users are advised to use the tools responsibly and in accordance with the terms and conditions of the tool providers.
Additionally, if you wish to maintain anonymity while using these tools, consider this article.